Friday, October 30, 2015

Podcast 15: A Coat

SHOWNOTES

      SSHandmade_Jenny on Instagram
      JennyAnne on Ravelry

Life - Here is a pic of my new sewing space.  I just need some better lighting!              

Goodies - I mentioned Myra
                 The fabrics from Pennie Fabrics that I mentioned for making an outfit:
                           

                 Gorgeous Fabrics
                 Ottoman striped fabric to make the tops in the second or tenth photo of this post

Sewing - Simplicity 1696
                recent pants I mentioned
                McCalls 7186 knit dress
                Burda 7765
                McCalls 5428
                McCalls 7162 peplum top
                Atkinson Designs  Wine and Dine


Knitting - Tucker Sweater from Interweave Knits Fall 2015
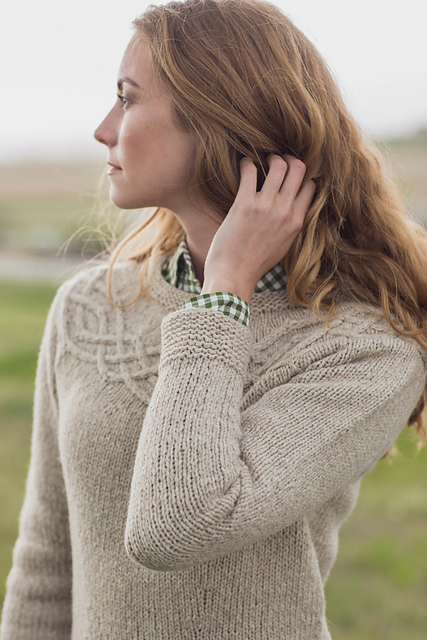
                                     
                                                                 Here is mine:                                                              

                                          Lace Saddle Tee in Malabrigo Arroyo
                                          My Sister's Sweater                                                     
                                                                   

                                        Butterbluemchen socks in Yarn Love Elinore Dashwood Arabian Nights

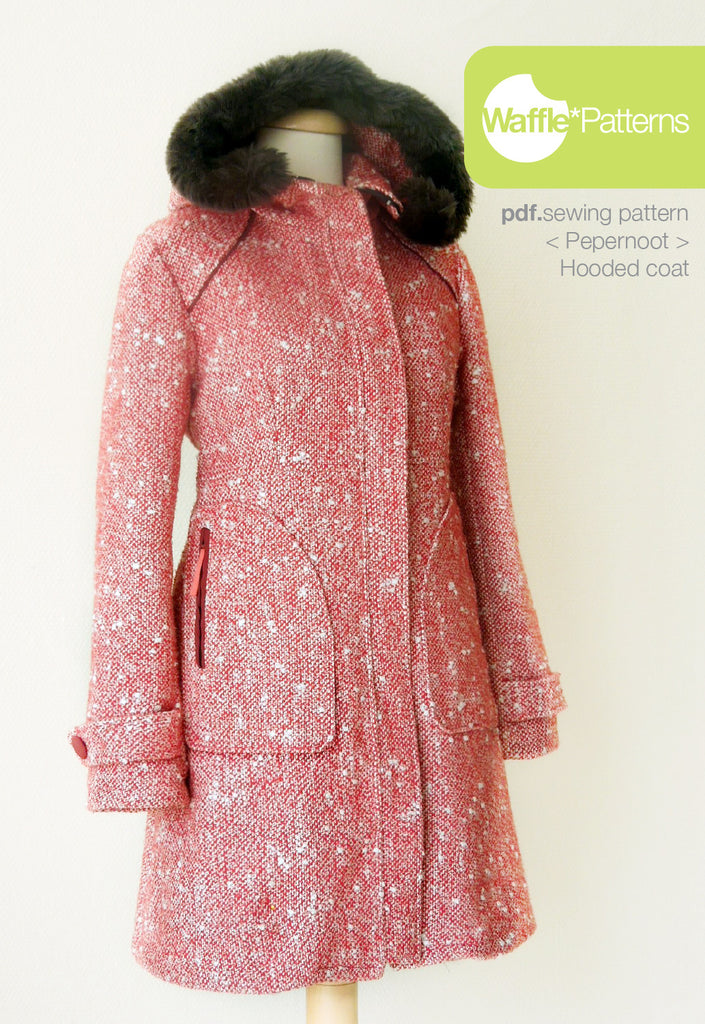
New to the Queue - Waffle Patterns
                                 Pepernoot Hooded Coat

My fabrics:


Saturday, October 17, 2015

Knit Tops - Cover the Back Neck Seam With a Knit Strip Tutorial

That is one long, awkward post title.  I don't know what to call this thing, but here it goes:

So I mentioned while reviewing the Idyllwild Top and Dress pattern from Itch to Stitch that I wanted to try the little strip of fabric at the back neck in my ready-to-wear tops. I already had the idea percolating in my brain from reading a post by Baste + Gather about adding twill tape, and the Idyllwild pattern mentioned it also as an option.

Inspection of my purchased tops showed that they use a little strip of knit fabric all neatly folded up, so I came up with a way to do this without burning my fingers ironing those little strips.  You just need fusible tape like you could use to fix a hem in place.  Here is an example.

Start with your knit top, after attaching the neckband and pressing but before top-stitching.  Cut two lengths of fusible tape the length of your back neckline.


Fuse one piece of fusible tape the the wrong side of your lightweight knit.  Keep the paper attached on top so that the tape doesn't fuse to your iron as well.  You are just fusing one side of the tape for now.  Leave a border around the tape.


Cut around the tape, leaving 1/4 - 3/8 inch border.  Peel off the tape's paper backing.


Fold the long borders in and fuse them down.  Fold in the short ends.  These don't have anything to fuse to, but that's ok.


I used some scissors to hold those little ends down while they cooled.  Then they stayed in place just fine.


** If you are able to iron all these little hems neatly without the fusible tape (and without burning yourself), leave out the strip of tape in the above steps.  This will save a little on bulk in the finished project.  I really like the precision and folding template that the fusible tape gives me.


Fuse the second piece of fusible tape on top of all the raw edges (again leaving the paper between the tape and the iron).  Peel off the strip of paper.


Now the fun part:  Pin (don't fuse!) the entire knit strip to the back neckline, overlapping the stitching line by 1/8".  My handy scissors are pointing to the stitching line.  Stitch again right on top of that stitching to hold the strip in place.  


Iron down the strip to cover the raw seam.  It will fuse in place.  Stitch 1/8" from the bottom edge of the strip.


It will look like this on the outside.


 Now, finish top-stitching the neckline.  blending the wider stitching on the back neckline with narrower stitching around the front.  This matches my purchased ready-to-wear tees.


Voila!  A pretty detail that also keeps the back neckline from rolling out.


FYI, the links to Itch to Stitch are affiliate links.  I promise I'm not getting rich.  :-)

Friday, October 16, 2015

Itch to Stitch Idyllwild in ponte

This is my first version of Itch to Stitch's Idyllwild Top and Dress pattern.  I've been using the super out-of-print Butterick 3344 for many years as my basic tee shirt pattern. I figured it was time for an upgrade since that one is falling apart and skin-tight (in the style of 10 years ago).  I bought this pattern a while ago when it was first released for $1.  The price has gone up, but it is still a great pattern.

This pattern offers two rounded neckline options (I made the deeper one) and lots of sleeve options.  There are also options for ruching on the long sleeves and the body of the top.  My measurements put me smack dab between an XS and a S, so I just cut right in between the two sizes.  I'll size down on my next version.  I took a bit out of the side seams after putting together the body of this one, but I also think the roomier fit would be fine with a more lightweight fabric - just not this ponte.

 This is one beefy tee.  The fabric is from my beloved Pennie Fabrics in Sarasota.  In hindsight, it would have made a fab ponte dress, but I had my mind set on a tee.

I think I prefer it tucked in like this.

Here it is untucked.  Not loving that look in this fabric.  This feels like a dressier tee, not one I will throw on with my yoga pants for a 7:30 am bike ride to school.

It's funny I never know what creations will be a hit with the Hubs.  This is the most basic of basic tees, but he really liked it and noticed the contrast inside neck band :-) which brings us to...
 Probably my favorite detail of this tee is the little striped strip that I added to the back neckline.  This really elevates the whole top.  I'd had the idea in my head after reading this post, and Kennis actually does mention this step in her pattern, which is an awesome detail.  I think she suggests bias tape, but after some serious inspection of my ready-to-wear tees, I discovered they have strips of lightweight knit fabric.  I pulled this bit out of my fabric scraps and am thrilled to pieces with the result.  I photographed my process and plan to do a little tutorial about it.

Here is the view on the outside of the back.  The wider top-stitching on the back than on the front is taken straight from my ready-to-wear tees.


FYI, the links to Itch to Stitch are affiliate links.  I promise I'm not getting rich.  :-)

Monday, October 12, 2015

French Cancan Shawl

.This pattern is called French Cancan.  I love the simple body, the cozy dk yarn weight, the crescent shape (the easiest shawl shape to wear, in my opinion), and the fun perpendicular braided border. 

 The yarn is 2 skeins of Voolenvine Yarns' Smitten dk in the Dirty on Purpose color.  It has gotten harder to snag some of Kristen's yarn right at a shop update time.  I'm happy for her success, but I don't see much Voolenvine in my future because it's just hard to get.
 The pattern calls for a garter stitch body, but I really loved how this yarn looked in stockinette stitch, so I modified for a stockinette stitch body with a little garter border before beginning the knit-on braid edging.

 It's actually a little small to wear in a classic shawl style, and I'm not really a classic shawl style girl, so I wear it more like a scarf.

This is the best photo I got of the shape.  You can see that using stockinette stitch instead of garter stitch for the body made for some wonkiness in the middle at the top, but I don't mind since I wear it more like a scarf anyway.  I'd love to knit another one using all garter stitch and maybe 3 or 4 skeins instead of 2 for some serious coziness.
Here is my project on Ravelry.


Sunday, October 11, 2015

McCall's 5857

Hi there!  I have such a backlog of projects I want to share.  I've been sewing and knitting up a storm since the boys have been back at school and back in their activities.  First up is some fun shorts using McCall's 5857.  This pattern is apparently out of print, which is just silliness, because it is a lovely basic shorts pattern.

The reason I am headless in these shots is not because my head looked a fright that day.  Actually, I had just finished fluffing my hair and reapplying lipstick.  No.  The reason I am headless is that the exact second Hubs and I went out to take photos (in the fading light, of course), it started to rain, so we opted to stay on the covered section of the porch.  Hence, close quarters, and hence, no head.

Anyway, the fabric is a fun cotton madras from Pennie Fabrics in Sarasota.

 This pattern has a mock fly front, which looks fine from the outside but isn't as pretty inside.  Easy enough to change if I'm ever so inclined.
 I love it with my chambray shirt (purchased, not sewn).

By the way, I've made these shorts once before, but before you click on the link, know that wool shorts were "in" for a minute, and you may find your heart in your throat at sight of a little fellow who is now 6 years old (no?  just me?).  Anyway, here they are.  :-)